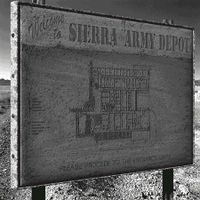
Sierra Army Depot
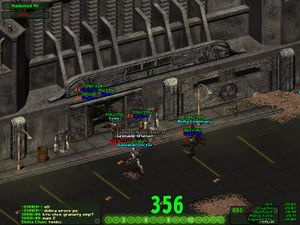
Sierra Dungeon is probably the most complicated and toughest dungeon in the whole world of FOnline2. You need to gather a strong pack of wastelanders if you are planning to execute full dungeon clear. The surface is protected by several strong turrets, but when dealing with them remember that those deadly weapons can be your shield repelling other wastelanders, later in the dungeon while you are inside and other gangs are monitoring your actions.
Description
Starting from season 3 to gain access to Sierra main storage (Level 2) you need to obtain General Clifton's Holodisk first which can be only found in Sierra Caves Complex (or alternatively won in Hunger Games Event). Sierra Army Depot is a place where you can find implants and other rare pieces of technology. On the other hand due to this dungeon difficulty level, finding death and losing all your gear is also very big possibility.
Enemies
| Robobrain | Vital Statistics | Resistances (DT/DR) | Notes | ||||||||||||||||||
|---|---|---|---|---|---|---|---|---|---|---|---|---|---|---|---|---|---|---|---|---|---|

|
|
Gunslinger type. Usually armed with FN FAL (Cannot be looted) with infinite ammunition. | |||||||||||||||||||
| Eye bot | Vital Statistics | Resistances (DT/DR) | Notes | ||||||||||||||||||
|---|---|---|---|---|---|---|---|---|---|---|---|---|---|---|---|---|---|---|---|---|---|
|
Melee type. Extremely dangerous on close combat due to their ability to omit most of armors. | ||||||||||||||||||||
2. Sentry bots
Those really strong robots can be spot at level 2, 3 and 4. You won't encounter big numbers of them...well except for level 2 when you will meet entire army of them. They have 999 hitpoints. They Use Robo Gatlings or Robot Rocket Launchers and give 3000 experience points after killing.
Nowadays we received few reports about encountering Sentry Bots armed in Gatlings. These incredibly strong opponents are supposed to reside in Level 2 armory and some other places of Sierra Dungeon - only few has survived meeting with them and barely few escaped. No reports of successful battle against them has been done yet.
Yet another report is claiming that avenger using robots has been completely replaced by their Gatling using brothers. What used to be horror locked on level 2 is now common sight on all levels except for the 1st floor. It looks like Sierra's Robotic Forces are adopting to wastelander's capacities...
Note: The Gatling mounted on robots are not dealing laser damage, instead they are dealing normal type of damage. The true problem with these weapons and the reason those miniguns are called Gatling is that similarly to Gatling laser they will penetrate armor, meaning that DR (Damage Resistance) of your armor won't be helpful. The only thing that reduce damage received from Gatlings is DT (Damage Treshold)
| Sentry Bot | Vital Statistics | Resistances (DT/DR) | Notes | ||||||||||||||||||
|---|---|---|---|---|---|---|---|---|---|---|---|---|---|---|---|---|---|---|---|---|---|

|
|
Very powerful enemy! Destroying even one such robot is hard task. | |||||||||||||||||||
3. Sentry Turrets
A few stationary turrets are deployed on the Sierra Surface. They can cause huge damage, and their twin miniguns omits most of armors which means that if you enter at their range (40 hexes) you're in troubles!
| Auto-Cannon | Vital Statistics | Resistances (DT/DR) | Notes | ||||||||||||||||||
|---|---|---|---|---|---|---|---|---|---|---|---|---|---|---|---|---|---|---|---|---|---|

|
|
The best way to deal with them is by using Sniper Rifle or any other weapon with more than 40 hexes of range. | |||||||||||||||||||
Force Fields
To get through the force fields you will need to use repair. In order to have a higher chance of lowering the force shield you will need at least 80-100%, more would be preferred. If you use tools on force fields science check will be done instead. So having both good science and repair plus taking with you tools will make you go through the force fields much faster.
Note: It seems that only tools works, while super tools kit doesn't. Weird.
Walkthrough
Entrance/Ground Floor
Firstly your group should spawn north, then quickly destroy the sole turret guarding entrance to the underground hole near generators. Go there and by using switch that's located there, you will turn off remaining turrets for 10 minutes. Do note that you can't use the switch if somebody else did that in last 60 minutes instead you will get the warning: "The switch is in locked position.".
Alternatively two or three snipers entering south can quickly snipe down every hostile turrets in the region. One way or another when you're done with the turrets your group can enter from one of two possible main entrances. On the surface there is also elevator leading to Sierra's Underground level.
Level 1
You can reach level 1 by using one of two main entrances from the Surface map. In both cases futher journey will be blocked by forcefields. Once you get through forcefield prepare for combat, 4 Robobrains with FN FAL is going to attack you, once you are done dealing with them get through second forcefield - this time 4 Eyebots will make their attack. Once you take care of them you can loot the level. For now skip level 2. Despite alarm being turned off or on, robots on level 1 are always hostille.
On Level 1 there's also elevator leading to underground level. Careful! Once you are in underground level you cannot return to level 1 using that evelator, it's a one way trip.
Level 3
After spawning you will see two elevator: one is the one that you used to get here and there's also an elevator without power leading you to level 4. Your main task on this level is to turn it on. When you enter here on the left you will found containers with some minor loot. On the right there's power field leading to rooms with another minor containers and the center computer room. The Sky(cast)net heart. There's a 999 hp robot guarding this place. He will attack you as soon as you enter. Killing him will not turn on the alarm so finish its miserable robotic life. In addition there's few robots patrolling this level. They will also attack you on sight and killing them will also won't turn on the alarm.
The PC on the right side server to turn on Sierra Control mode. If you want to do it its still advised to hack towers using the main PC. The main PC will be useless for any character with less than 130% science. Once you will have 130% Science you can access to more options than useless: "Browse Database". The option you will have are: Hacking the Sentry towers and Connecting Backup Power
Hacking Towers are quite easy, just click on this option and it's done. From now one for 60 minutes towers will not shoot at you, members of your gang and also allied gangs. This is good protection while doing both Sierra Control and Dungeon. Do note that this option is available only for gang members. The Second Option: "Connecting backup power" will be a way more tricky one. You will have 10 seconds for doing it right. You will have to press hacking which will be switching position in dialog menu. If you make an mistake you will turn on the alarm. If you are to slow you will also turn on alarm. Just click fast and steady.
The correct combination for "wait" dialog lines is: 121122121. This is actual as for 20.04.2014 and remember that it might change at any point so don't click blindly the combination but use it as helpful note not 100% correct guide.
If you do turn on the alarm all robots become hostile and thus you and your entire team will probably die. Hey! At least you can return here in 20 minutes after robots has calmed down to get your gear back, well although armors will probably have few more holes in them.
Once you had brought power to the elevator move to level 4. Remember that on level 4 you can spend not more than 10 minutes.
Note: The workbench container seems to be always empty.
Level 4
On this level there's some lockers and the computer where you can open the doors on level 2. Just like on level 3 here on level 4 you can also find few robots patrolling this area which are always hostille (killing them won't raise alarm). Go to it, you will find an another hostile Robot guarding the lockers and computer. Killing him will not turn on alarm so do so. Loot container and then click on computer. You will need at least 130% science. From now one you have 10 minutes to explore level 2.
Level 2(Final)
In level 2 firstly you need to clean up robots in hall. That's a hard task. Possible solutions? Dynamites, EMP Grenades, Good placement of your troops. Innovative tactics? Holy Hand grenades? Better figure out something good or die there as this place is truly hard. To proceed further you will need General Clifton's Holodisk which is having codes necessary to unlock finally room. A Huge group of robots will rush out as soon as this is done - clean them up in quickly fashion or be cleaned up, it's the final test for you and your team. If you win - loot containers in both treasure room and at top of the base. Then leave level 2 before doors close up and enjoy great rewards.
First wave of robots is being consisted of 9 Powerful Sentry Bots (and 2 small ones). The next one is even bigger - it is nearly entire army, 13 of Sentry Bots. Assuming one person in your team can take down one sentry bot on his own lets say that you need at least 13 players in total to have proper chances of succeeding. This is just hypothesis though. One thing is certain - you need every man you can gather up. If you're team doesn't have enough people you can try to use explosives to compensate for lack of team members. A dozens of well placed mines in conjunctions with mass of c4 launched exactly at correct moment should seriously cripple the attacking robots.
The containers in armory are containing the top tier 4 weaponry, sometimes implants, outside of this loot they also spawn a lot of explosives like mines or dynamite.
The containers in the north of level 2 are having some decent items. There is also a chance to spawn there some rare stuff but overall north containers are obviously not as interesting for players as Sierra's Armory treasures are. Still going to Sierra just for them might be considered as a nice training before final fight. Starting from september 2015 players can find a General Clifton's Holodisk in those boxes as well as some implants and other top stuff there.
Note: Sierra Treasury used to have chance of spawning Power Armor here. It is unclear whether this chance is still present in current season.
Note: The Armory room will auto close in 10 minutes from opening similarly to elevator doors. Any players that get trapped inside of Armory room will die to lack of air so loot quickly and get out of that place as soon as its possible or die inside.
Underground Level
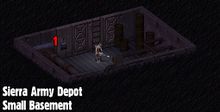
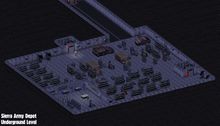
You can get to this level either by coming here from level 1 or by using Escape Elevator located at surface in one of the buildings. This level is devoid of any NPC's. There are few containers that sometimes spawn loot. Players visiting this level mostly use it as an escape route after clearing the rest of the dungeon. Remember it is impossible to get from this level to level 1 of Sierra Army Depot (The elevator on level 1 is allowing players only to go down here but not to come back).
Base Alarm
By default many robots in this base are not hostille however there are few ways to trigger the base alarm and make all of them hostille. Here's list of way on which you can trigger the alarm:
- If you attack any robots you will turn on alarm.
- If you cross red line on the level 2 you will turn on the alarm
- If you fail hacking at level 3 computer you will turn on the alarm.
- If you block a path of robot that is returning to it's place you will trigger the alarm.
- If you set off a trap (mine, dynamite, c4) you will turn on the alarm.
- Once triggered alarm will not go off as long as Level's 2 Armory door are open.
Notes:
- Shooting other players will not trigger on alarm.
- Shooting robots while alarm is on will not prolong alarm.
- Shooting aggressive robots on level 1, 3 and 4 will never prolong or trigger the alarm.
Dungeon Maps
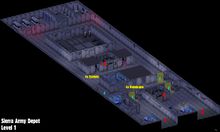
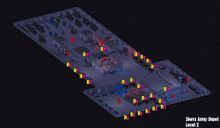
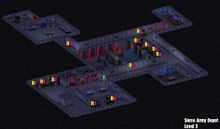
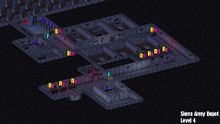
Sierra Army Depot is made of 5 levels. A big entrance map is also present.
Points of Interest
Onground
- T - A Guarding Turrets.
- Escape Elavator - This old elevator can take you to underground level.
Note: On the map you can find several unmarked containers which are always empty.
Level 1
- 1 - Left Entrance
- 2 - Right Entrance
- 3 - Elevator to next Sierra levels.
- 4 - One way elevator to underground level.
- C - Containers.
- F - Force fields.
- Robots - They are always hostile, in their case it doesn't matter whether base alarm is triggered or not.
Level 2
- 1 - Elevator.
- 2 - PC via with you can open door to main storehouse. (You will need General Clifton's Holodisk.)
- 3 - Storehouse, filled with loots and robots.
- 4 - Advanced Workbench. Here you can craft tier 4 items...well assuming you ever find the components.
- 5 - Alarm triggering wire.
- 6 - Rooms protected by unbreakable doors.
- Rg - Robots using Gatling.
- Rrl - Robots using Rocket Launchers.
- Rm - Melee robots.
- c - Containers.
- c(!) - Container that has chance of spawning implant or tier 4 components.
Level 3
- 1 - Elevator.
- 2 - PC in which you take control over turrets and hack elevator leading to level 4. (Needs 130% Science)
- 3 - Elevator leading to level 4.
- 4 - PC in which you can start Base control mode.
- L - Locked containers.
- F - Force fields.
- Rm - Melee robots.
- Rb - Brainbots.
- Rg - Robots using Gatling.
- Rrl - Robots using Rocket Launchers.
- c - Containers.
Level 4
- 1 - Elevator.
- 2 - A PC from which you can open doors at level 2.
- c - Containers.
- F - Force fields.
- Rm - Melee robots.
- Rg - Robots using Gatling.
- Rrl - Robots using Rocket Launchers.
Underground Level
- c - Containers.
- 1 - Useless Elevator.
- 2 - Elevator leading to the surface.
Sierra - Base Control
Sierra base control is an team PvE mode in which group of players defend themselves against incoming attacks of either Brotherhood of Steel or Enclave. The attacks are coming in waves, after each 3 ways there is an reward - spawned Scout or Hummer with loot inside its truck - the car itself though is protected by a magical curse which cannot be removed.
To turn on Sierra Base control you have to go on level 3 of Sierra Dungeon, there you will take control over Sierra using computer. You will have to choose side. If you choose Enclave you will be attacked by Brotherhood of Steel forces and vice versa. Additionally from now one each turret in the location will protect you and your gang teammates from wastelanders not being in your gang. They will not shoot incoming NPCs though.
The Sierra base control is over when the person that started it dies. Make sure that won't happen early as the further your team will survive there, the better chance you got to spawn good stuff inside the truck. The chance for best loot max out after 10th car (After 30 wave). The maximum number of NPCs being spawned per wave max out after 15th car (After 45th wave) so if your group can handle this much it won't ever get harder...well there is one problem though, in sesssion 3 of FOnline2 no gang has even reached the 15th car.
Choosing different sides impact on list of possible items that can spawn. It's probably doesn't concern any other items except for power armors though. If you choose Brotherhood of Steel you will be able to find Power Armors and Hardened power armors but Scout's trunk will never contain Advanced Power Armor or Advanced Power Armor MK II (and vice versa).
Note: Once Sierra Control feature is started everyone can see the current Sierra Control list on their Pip-Boy. This means that expecting only PvE while doing Sierra Control is well, a bit of wishful thinking. Also the best sierra controller entry means the person who launched it the most time. The amount of launched controls is what counts not its duration.
Enemies
Enclave Side: Fighting Brotherhood of Steel
| Brotherhood Initiate | Vital Statistics | Resistances (DT/DR) | Notes | ||||||||||||||||||
|---|---|---|---|---|---|---|---|---|---|---|---|---|---|---|---|---|---|---|---|---|---|
|
- | ||||||||||||||||||||
| Brotherhood Knight (A) | Vital Statistics | Resistances (DT/DR) | Notes | ||||||||||||||||||
|---|---|---|---|---|---|---|---|---|---|---|---|---|---|---|---|---|---|---|---|---|---|
|
- | ||||||||||||||||||||
| Brotherhood Knight (B) | Vital Statistics | Resistances (DT/DR) | Notes | ||||||||||||||||||
|---|---|---|---|---|---|---|---|---|---|---|---|---|---|---|---|---|---|---|---|---|---|
|
- | ||||||||||||||||||||
| Brotherhood Paladin (A) | Vital Statistics | Resistances (DT/DR) | Notes | ||||||||||||||||||
|---|---|---|---|---|---|---|---|---|---|---|---|---|---|---|---|---|---|---|---|---|---|
|
- | ||||||||||||||||||||
Brotherhood Side: Fighting Enclave
| Enclave Recruit | Vital Statistics | Resistances (DT/DR) | Notes | ||||||||||||||||||
|---|---|---|---|---|---|---|---|---|---|---|---|---|---|---|---|---|---|---|---|---|---|
|
- | ||||||||||||||||||||
| Enclave Trooper (A) | Vital Statistics | Resistances (DT/DR) | Notes | ||||||||||||||||||
|---|---|---|---|---|---|---|---|---|---|---|---|---|---|---|---|---|---|---|---|---|---|
|
- | ||||||||||||||||||||
| Enclave Trooper (B) | Vital Statistics | Resistances (DT/DR) | Notes | ||||||||||||||||||
|---|---|---|---|---|---|---|---|---|---|---|---|---|---|---|---|---|---|---|---|---|---|
|
- | ||||||||||||||||||||
| Enclave Veteran Trooper | Vital Statistics | Resistances (DT/DR) | Notes | ||||||||||||||||||
|---|---|---|---|---|---|---|---|---|---|---|---|---|---|---|---|---|---|---|---|---|---|
|
- | ||||||||||||||||||||
Trivia
- This was probably the most bugged dungeon in the game during session 2.
- This was also the most abused dungeon in the game during session 2.
- Player Acosta states:
Which gives him and his team mates probably best result of all times. I browsed through old Crazy 88 screens and found one screens from time he was talking about.
Note:This screen comes from session 2. It is impossible to get such amount of loot nowadays. The NPC's are also well more deadlier in current session. Don't get your hopes up.
- The Armory full respawn time is taking probably about 2 hours. First containers should be refilled after 40 minutes from plundering the armory.
- You can find Power Armor in the Sierra Armory, although chance is really, really small.
Video Footage
| "Hello Kitty and Rogues doing first part of Level 2." |
|---|
| "A BBS Team attempting to do Sierra Dungeon in Season 3" |
|---|
| "A Boom Come Back Team video playthrough from Season 2 Sierra" |
|---|
| Fonline 2 Locations: | ||
|---|---|---|
| Towns: | * Boneyard * Broken Hills * The Den * Gecko * Junktown * Klamath * Modoc * New Reno * Redding * San Francisco * Shady Sands * The Hub * Vault City | |
| Dungeons: | * Ares * Toxic Caves * Vault 15 * Sierra Army Depot * Warehouse * Necropolis * Vault 12 * The Glow * Tanker's Holds * Mariposa Military Base * Cathedral | |
| Others: | * Caravan Depot * Brotherhood of Steel HQ * Navarro * Gas Station * Alcatraz * Unknow Residence * RocketBall | |
